Welcome to Altair680Kit.com! Home of the New Altair 680 Replica Kit! |
| Comparing the Vintage
Authentic Altair 680 to the Replica Please contact me with ANY questions or comments you have after reading this. Thanks! Care was taken
throughout the process of developing the kit to preserve the experience
of building the kit in 1975. For example, no ICs were substituted
for easier to find equivalents. There were some changes made
to the kit for quality and safety purposes. I will explain
for each part of the kit what was changed and the reasons for each
change.
One thing that was changed throughout the kit was the substitution of all disc capacitors with axial capacitors. This was done because those capacitors are easy to damage and don't last as long. All of the PCBs in the kit have a custom solder mask created by me. This solder mask improves the visual appearance of the boards and helps to make them noticeably different from a real vintage MITS board. It also makes the boards easier to assemble because it helps to prevent bridging a solder joint to a neighboring trace. I created the solder mask by duplicating the top copper layer and deleting all elements except for the pads that required soldering. Special areas like card edge connector and heat sink surface were not covered in mask because that would interfere with proper operation of the board! (Not so much with the heat sink, but it helps!) The sample picture is from the CAD file for the CPU board. I will now cover each part of the kit in detail focusing on the PCB artwork, power supply, and case. 1. PCBs
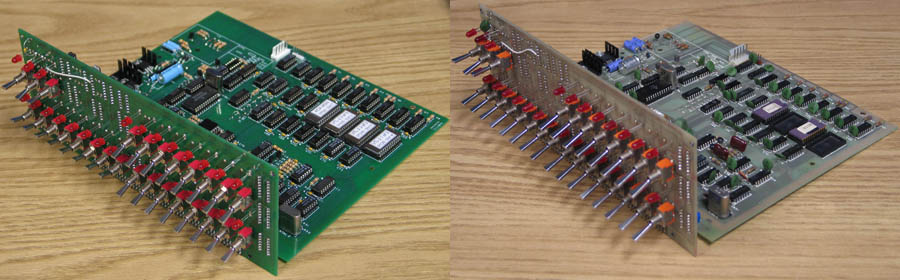 Replica-Left, Vintage-Right 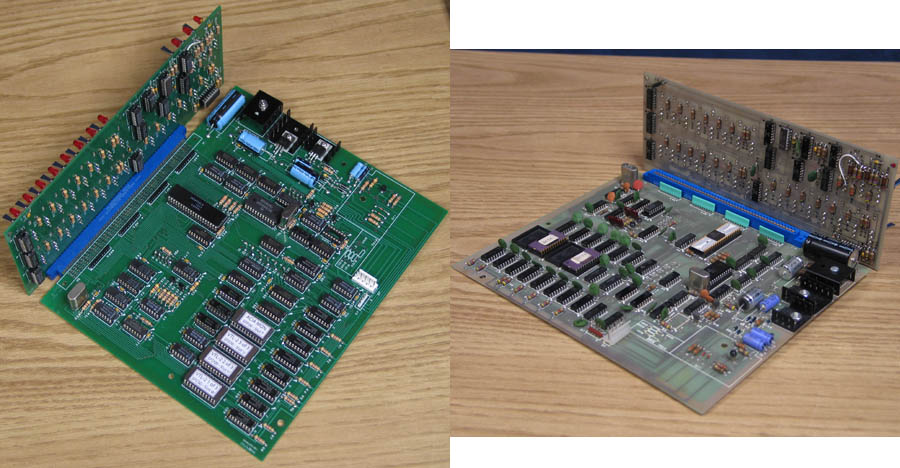 Replica-Left, Vintage-Right (sorry for the difference in perspective, I'll try to get better pictures later) Nothing was changed on the two boards, "Main Board" and "Front Panel", except for the silkscreen and an addition to the copper layer. I modified the silkscreen quite a bit to reflect my interpretation of MITS's intent. Using my Gerber CAD program I enlarged some silkscreen elements (like IC rectangles) and shrunk others (like resistor and capacitor symbols. On these boards I have preserved the MITS font, moved the silkscreen elements away from soldering areas, and shrunk silkscreen graphics to fit within the pads. The silkscreen modifications, in my opinion, make the boards easier to assemble and also look better. Below are pictures at 1:1 scale showing some of the differences. I have also added a solder mask to the boards which improves appearance and protects traces against solder bridges and shorts from metal objects. 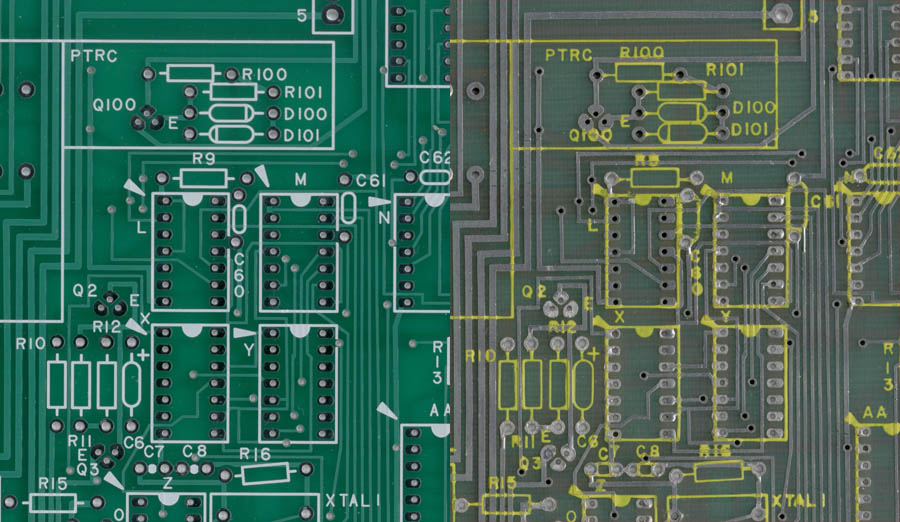 2. Power Supply [Picture coming soon!]
The power supplies used with the replica are obviously
quite different from the transformers used in the vintage unit!
Switching power supply technology has many benefits over the
linear transformer power supplies. Noise, efficiency, weight,
size, voltage input options, and safety are a few of the
benefits!
The power supplies are internally fused, and have output over voltage protection and output over current protection (overload) circuits. They also automatically recover from these faults when the fault is removed. These are dangerous because there are exposed AC voltages present. The computer should not be used unless the case cover is installed. 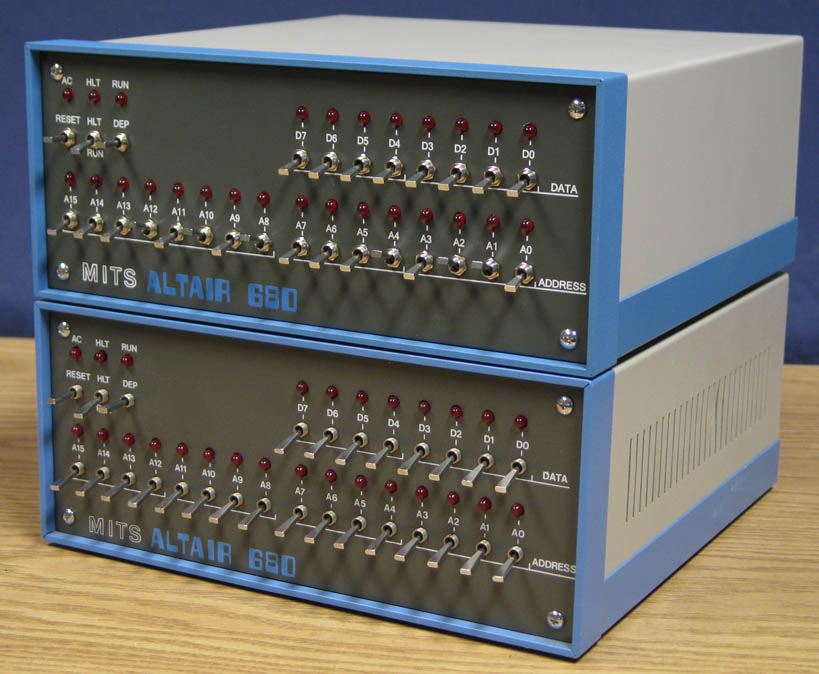 Vintage-Bottom, Replica-Top (switch nuts not installed on vintage unit) 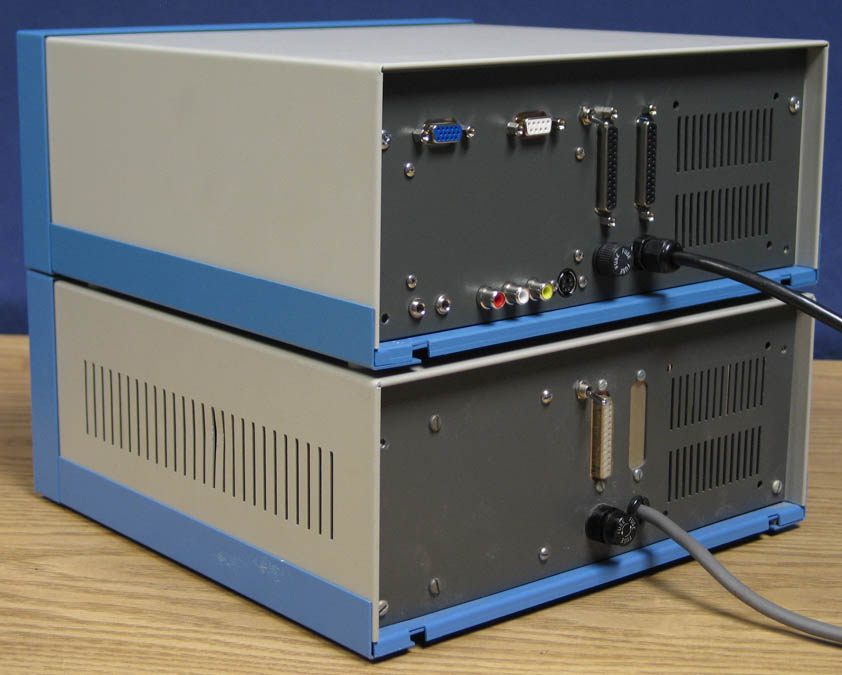 Vintage-Bottom, Replica-Top (not all case screws installed) - The looks a little faded on the 30 year old computer! : ) The genuine Optima enclosure used in the replica is identical to the vintage Optima enclosure used by MITS. The paint/color codes used on the cases is identical to the cases sold in 1975. The front panels are powder coated and then silk screened with white ink. The only difference is the back panel, and lid. There are NO vent holes in the replica lid unlike the original. I was expecting to have vent holes, but Optima said they were not "standard". When they told me that the case was still a standard item in their catalog, I assumed that the vent holes were included. Not having vent holes does not cause overheating in the replica because of the efficient switching power supplies. The lack of vent holes also reinforces the difference between a replica and an authentic vintage unit. So what are we left with? Hopefully you will agree with me that it is be best combination of modern compromise and historic authenticity! Please contact me with ANY questions or comments you have after reading this. Thanks! Visit Stockly Electronics
Forums for more pictures as they become
available!
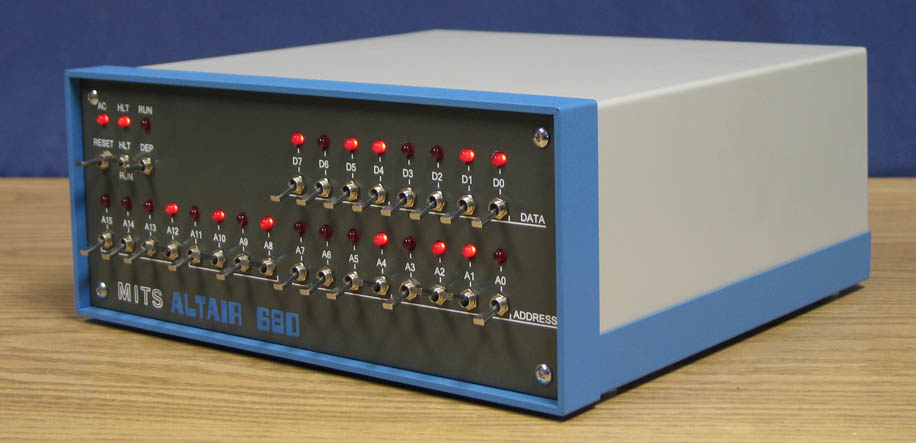 The completed Altair 680 replica computer. Visit Stockly Electronics Forums for more pictures as they become available! |
| ©2007 Grant Stockly
|